India’s No.1 Recharge API Provider

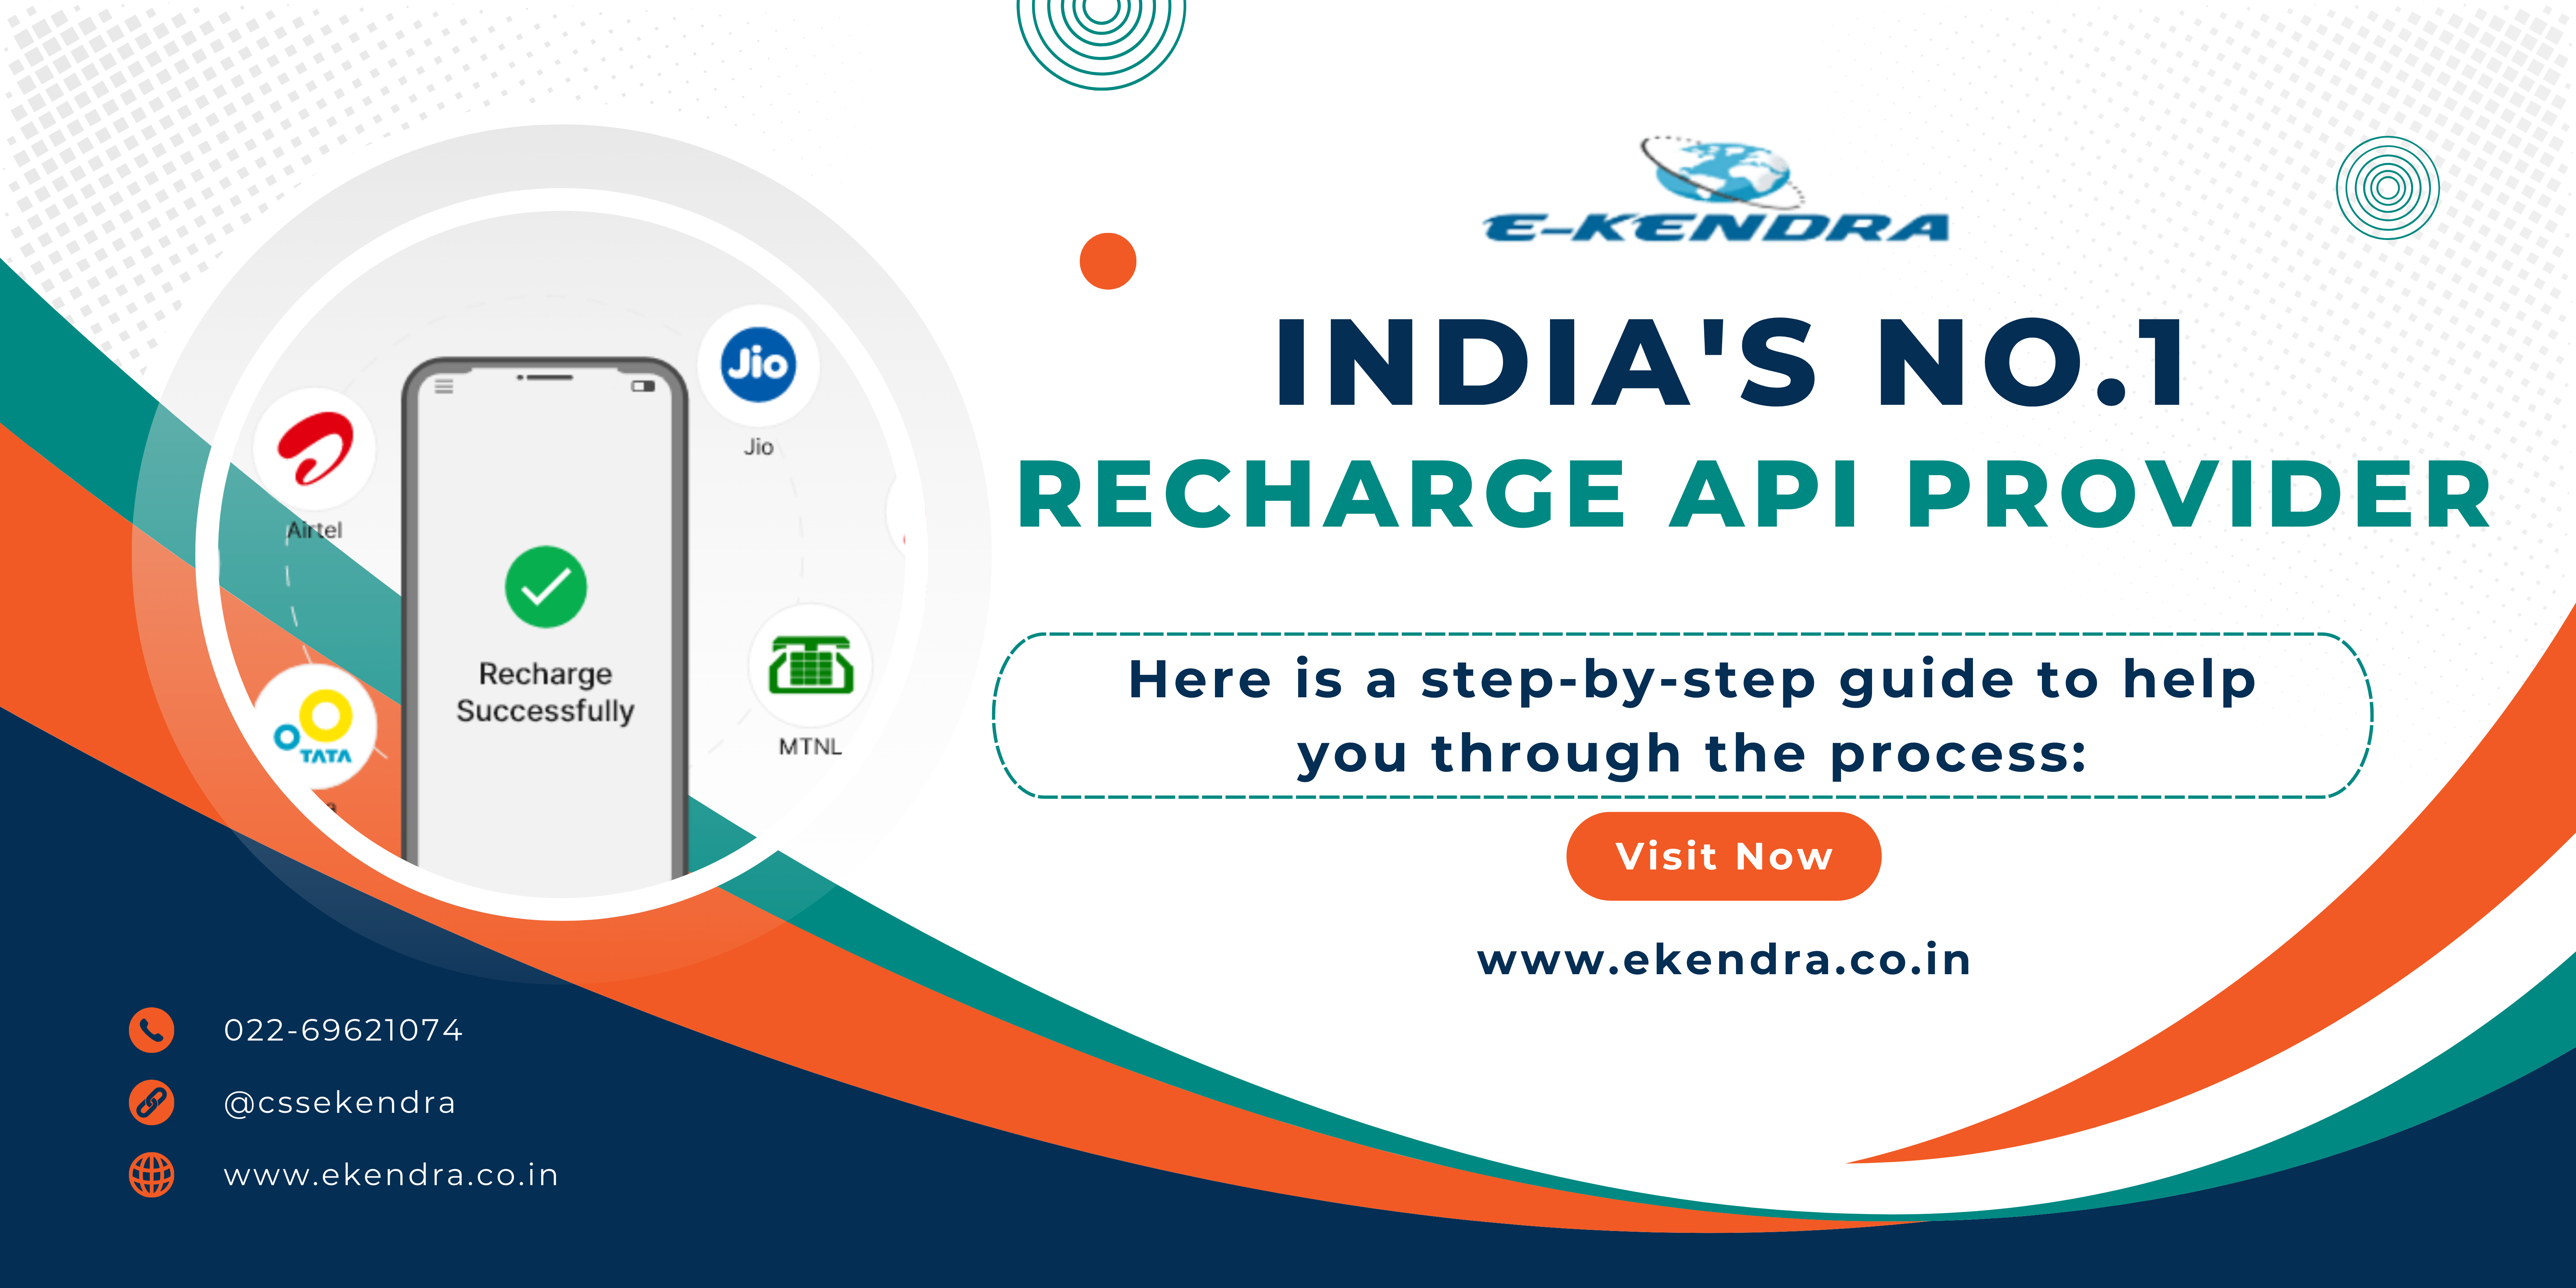
India has several leading recharge API providers. One of the most prominent is Paytm. Here’s why Paytm is considered one of the top recharge API providers in India:

Deeperweb Recharge API

Features

  1. Comprehensive Coverage:
  • Supports mobile recharges for all major telecom operators.
  • Offers DTH recharges for all leading DTH service providers.
  • Includes utility bill payments and other financial services.
  1. Secure Transactions:
  • Ensures secure transactions with robust encryption protocols.
  • Provides token-based authentication for secure API access.
  1. Real-time Processing:
  • Real-time processing of recharges and bill payments.
  • Instant updates on transaction status.
  1. Easy Integration:
  • User-friendly API documentation and support.
  • Sample code and SDKs available for various programming languages.
  1. Detailed Reporting and Analytics:
  • Comprehensive transaction reports.
  • Real-time analytics for better monitoring and management.
  1. High Reliability and Uptime:
  • Ensures high uptime and reliability for uninterrupted service.
  1. Customer Support:
  • Dedicated support for API integration and troubleshooting.

Other Notable Providers

CSS Ekendra Private Limited

  • Features: Mobile and DTH recharges, bill payments, digital wallet integration.
  • Strengths: Strong merchant support, competitive pricing, and comprehensive API documentation.

Choosing the Right Provider

When choosing the best recharge API provider for your needs, consider the following factors:

  • Coverage: Ensure the provider supports all the operators and services you need.
  • Reliability: Look for providers with high uptime and reliable service.
  • Support: Check for good customer support and detailed documentation.
  • Cost: Compare pricing plans to find a provider that fits your budget.
  • Scalability: Ensure the API can handle your transaction volumes and can scale with your business.

Related post:

Social media: Follow the CSS Ekendra Private Limited channel

Websitehttps://www.ekendra.co.in
Facebookhttps://www.facebook.com/cssekendrapvtltd
Youtubehttps://www.youtube.com/@cssekendra/videos
Telegramhttps://telegram.me/s/cssekendra
Instagramhttps://www.instagram.com/cssekendra
WhatsApphttps://whatsapp.com/channel/0029VaA8dlYKmCPSebRIY92k

Mobile & DTH Recharge API

A Mobile & DTH Recharge API allows businesses to offer mobile and direct-to-home (DTH) recharges to their customers through their own platforms. These APIs typically provide functionalities such as checking recharge plans, processing recharges, and verifying the status of transactions. Here’s a basic outline of how such an API works and what features it might include:

Key Features of a Mobile & DTH Recharge API

  1. Authentication and Security:
  • API Key or Token-based authentication.
  • Secure data transmission using HTTPS.
  1. Recharge Plans and Details:
  • Fetch available recharge plans for different operators.
  • Get details of specific recharge plans.
  1. Recharge Processing:
  • Submit recharge requests for mobile or DTH services.
  • Check the status of recharge requests.
  • Handle successful and failed recharge transactions.
  1. Transaction Management:
  • Track transaction history.
  • Generate reports on recharges processed.
  1. Operator and Circle Management:
  • Support for multiple operators and regional circles.
  • Retrieve the list of supported operators and circles.
  1. Error Handling:
  • Detailed error messages for failed transactions.
  • Retry mechanisms for failed requests.

Example API Endpoints

  1. Authentication:
   POST /api/v1/authenticate

Request:

   {
     "apiKey": "your_api_key",
     "apiSecret": "your_api_secret"
   }

Response:

   {
     "token": "auth_token",
     "expires_in": 3600
   }
  1. Get Recharge Plans:
   GET /api/v1/recharge/plans?operator=OperatorName&circle=CircleName

Response:

   {
     "plans": [
       {
         "planId": "1",
         "amount": 100,
         "description": "Plan details here",
         "validity": "28 days"
       },
       ...
     ]
   }
  1. Process Recharge:
   POST /api/v1/recharge

Request:

   {
     "token": "auth_token",
     "operator": "OperatorName",
     "circle": "CircleName",
     "mobileNumber": "1234567890",
     "amount": 100,
     "rechargeType": "prepaid"
   }

Response:

   {
     "transactionId": "txn_123456",
     "status": "processing"
   }
  1. Check Recharge Status:
   GET /api/v1/recharge/status?transactionId=txn_123456

Response:

   {
     "transactionId": "txn_123456",
     "status": "success",
     "message": "Recharge successful",
     "details": {
       "operatorRef": "op_78910",
       "time": "2024-07-25T12:34:56Z"
     }
   }

Example Providers

Several companies provide mobile and DTH recharge APIs, including:

  • Deeper Web Technology: Offers APIs for various financial services, including mobile and DTH recharges.
  • CSS Ekendra Private Limited: Specialized providers like Reloadly, Ezetop, and others offer APIs for mobile top-ups and DTH recharges.
  • Telecom Operators: Some operators may provide their own APIs for direct integration.

Implementation Considerations

  1. Integration: Ensure seamless integration with existing systems.
  2. Scalability: Handle high volumes of transactions efficiently.
  3. Reliability: Ensure high availability and minimal downtime.
  4. Compliance: Adhere to local regulations and standards for handling financial transactions.

Related post:

Social media: Follow the CSS Ekendra Private Limited channel

Websitehttps://www.ekendra.co.in
Facebookhttps://www.facebook.com/cssekendrapvtltd
Youtubehttps://www.youtube.com/@cssekendra/videos
Telegramhttps://telegram.me/s/cssekendra
Instagramhttps://www.instagram.com/cssekendra
WhatsApphttps://whatsapp.com/channel/0029VaA8dlYKmCPSebRIY92k

Become an Insurance Agent

An insurance agent is a professional who sells and manages insurance policies to individuals and businesses. They act as intermediaries between insurance companies and clients, helping clients choose insurance plans that suit their needs. Here are the key aspects of becoming and working as an insurance agent:

Steps to Become an Insurance Agent:

  1. Educational Qualifications:
  • A high school diploma is the minimum requirement. However, a bachelor’s degree in finance, business, or a related field can be beneficial.
  1. Obtain Necessary Licenses:
  • To sell insurance, you need to be licensed by the state in which you plan to work. This usually involves passing a licensing exam.
  • There are different licenses for different types of insurance (e.g., life, health, property, casualty). You may need to obtain multiple licenses if you plan to sell various types of insurance.
  1. Complete Pre-Licensing Education:
  • Many states require you to complete a pre-licensing education course before you can take the licensing exam. The number of required hours can vary by state and the type of insurance.
  1. Pass the Licensing Exam:
  • Study for and pass the state licensing exam. The exam tests your knowledge of insurance laws, policies, and practices.
  1. Background Check:
  • Some states require a background check as part of the licensing process.
  1. Apply for the License:
  • Submit your application along with the exam results and any other required documents to the state insurance department.
  1. Continuing Education:
  • Most states require insurance agents to complete continuing education courses to maintain their licenses.

Types of Insurance Agents:

  1. Captive Agents:
  • Work exclusively for one insurance company and sell only that company’s policies.
  1. Independent Agents:
  • Work with multiple insurance companies and can offer a variety of policies to clients.

Responsibilities of an Insurance Agent:

  1. Assess Client Needs:
  • Meet with clients to understand their insurance needs and recommend appropriate policies.
  1. Provide Information:
  • Explain policy details, coverage options, premiums, and benefits to clients.
  1. Sell Policies:
  • Assist clients in purchasing insurance policies that meet their needs.
  1. Customer Service:
  • Handle client inquiries, help with policy changes, and assist in claims processing.
  1. Maintain Records:
  • Keep detailed records of client interactions and policy details.
  1. Stay Informed:
  • Keep up with industry trends, changes in laws, and new products offered by insurance companies.

Skills Required:

  1. Communication:
  • Strong verbal and written communication skills to explain policies clearly to clients.
  1. Sales Skills:
  • Ability to persuade and sell insurance products.
  1. Customer Service:
  • Providing excellent service and building long-term relationships with clients.
  1. Analytical Skills:
  • Assess clients’ needs and financial situations to recommend suitable policies.
  1. Detail-Oriented:
  • Attention to detail to ensure accuracy in policy documentation and client information.

Career Advancement:

  • Insurance agents can advance to higher positions such as senior agent, sales manager, or agency owner. Specializing in a particular type of insurance or earning professional designations (e.g., Chartered Life Underwriter (CLU), Certified Insurance Counselor (CIC)) can also enhance career prospects.

By following these steps and developing the necessary skills, you can build a successful career as an insurance agent.

Related post:

Social media: Follow the CSS Ekendra Private Limited channel

Websitehttps://www.ekendra.co.in
Facebookhttps://www.facebook.com/cssekendrapvtltd
Youtubehttps://www.youtube.com/@cssekendra/videos
Telegramhttps://telegram.me/s/cssekendra
Instagramhttps://www.instagram.com/cssekendra
WhatsApphttps://whatsapp.com/channel/0029VaA8dlYKmCPSebRIY92k

How to apply for PAN card

Applying for a PAN (Permanent Account Number) card in India involves a few steps. Here is a step-by-step guide to help you through the process:

Online Application:

  1. Visit the Official Website:
  1. Select the Appropriate Form:
  • For Indian citizens, select Form 49A.
  • For foreign citizens, select Form 49AA.
  1. Fill in the Application Form:
  • Complete the form with your personal details, contact information, and other required details.
  1. Submit Documents:
  • Proof of Identity (POI): Aadhaar card, voter ID, driving license, passport, etc.
  • Proof of Address (POA): Aadhaar card, voter ID, driving license, passport, utility bills, etc.
  • Proof of Date of Birth (DOB): Birth certificate, matriculation certificate, passport, etc.
  • Photograph: Recent passport-sized photograph.
  1. Payment of Fees:
  • Pay the application fee through Ekendra Wallet. The fee varies depending on whether the communication address is within India or outside India.
  1. Submission:
  • After filling in the details and making the payment, submit the application online. You will receive an acknowledgment number for tracking your application.
  1. Send Physical Documents:
  • Print the acknowledgment receipt.
  • Attach the required documents and photographs.
  • Send these to the NSDL/UTIITSL office by post within 15 days of the online application.

Offline Application:

  1. Obtain the Form:
  • Visit any PAN card center or download Form 49A from the NSDL/UTIITSL website.
  1. Fill in the Form:
  • Complete the form with your personal and contact details.
  1. Attach Documents:
  • Attach photocopies of the required POI, POA, and DOB documents.
  • Affix recent passport-sized photographs.
  1. Submit the Form:
  • Submit the form along with the documents to the nearest PAN card center.
  1. Payment of Fees:
  • Pay the application fee at the center.

Track the Status:

  • You can track the status of your application using the acknowledgment number on the NSDL or UTIITSL website.

Tips:

  • Ensure all information is accurate and matches the documents provided.
  • Double-check the application form before submitting.
  • Keep a copy of the acknowledgment receipt and the documents sent.

By following these steps, you should be able to apply for your PAN card successfully.

Related post:

Social media: Follow the CSS Ekendra Private Limited channel

Websitehttps://www.ekendra.co.in
Facebookhttps://www.facebook.com/cssekendrapvtltd
Youtubehttps://www.youtube.com/@cssekendra/videos
Telegramhttps://telegram.me/s/cssekendra
Instagramhttps://www.instagram.com/cssekendra
WhatsApphttps://whatsapp.com/channel/0029VaA8dlYKmCPSebRIY92k

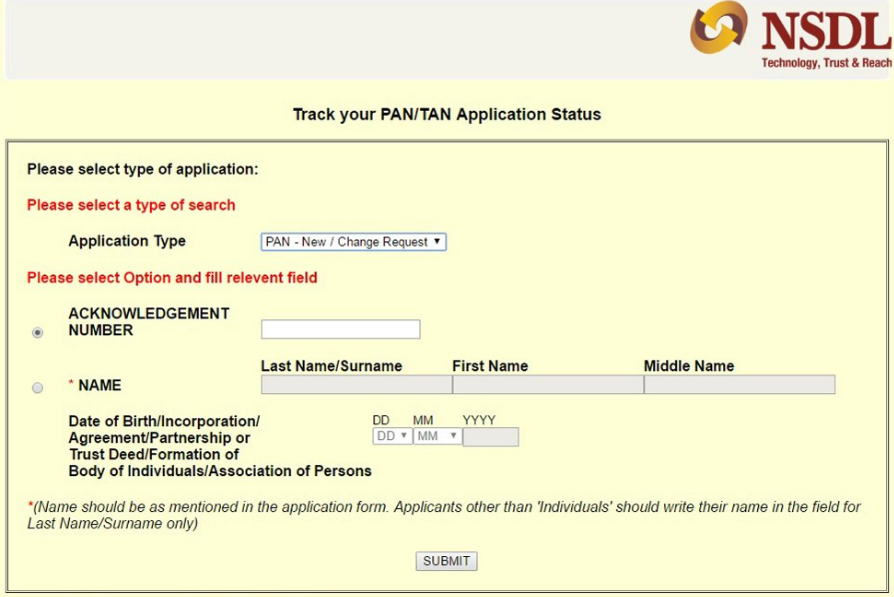
UTI PAN Card Status Check

How to Check Your UTI PAN Card Status

A Step-by-Step Guide

  1. Visit the UTIITSL Official Website: Start by visiting the official UTIITSL website. The intuitive design of the website ensures a user-friendly experience.
  2. Locate the PAN Card Services Section: Look for the ‘PAN Card Services’ section on the website’s home page. Click on the link to proceed to the PAN card status check page.
  3. Enter Your Application Coupon Number: Input your unique application coupon number provided during the PAN card application process. Ensure the accuracy of the information entered.
  4. Submit Captcha and Verification Code: Complete the security verification process by entering the captcha and the verification code sent to your registered mobile number or email address.
  5. Receive Status Update: Once the verification process is completed, you will receive a detailed status update on your PAN card application. This will include information on whether your card is under processing, dispatched, or if there are any issues requiring your attention.

Common Issues and Solutions

Navigating Challenges During Application

While UTIITSL strives to provide seamless services, applicants might face challenges. Here are some common problems and their solutions:

  • Application Documentation: Ensure all necessary documents are submitted correctly to avoid delays in the verification process.
  • Lost or Stolen PAN Card: If your PAN card is lost or stolen, report it immediately to the local police and apply for a duplicate card through the proper channels.

Conclusion: Empowering Your Financial Ventures

In conclusion, keeping track of your PAN card status is essential for smooth financial operations. UTIITSL’s efficient services and transparent status update system simplify the process, ensuring you are always informed about your financial standing. By following the steps outlined in this guide, you can confidently navigate the process of checking your UTI PAN card status, empowering your financial ventures.

NSDL PAN Status Check

Unlocking the Secrets of NSDL PAN Status Check: Your Definitive Guide

In today’s digital age, where technology is constantly evolving, it’s essential to stay ahead of the game, especially when it comes to managing your financial matters. One crucial aspect of your financial portfolio is your Permanent Account Number (PAN). It serves as a unique identifier for all your financial transactions and is issued by the Income Tax Department of India. If you’re looking for a comprehensive guide on NSDL PAN status check, you’ve come to the right place.

Understanding the Significance of PAN

PAN: A Gateway to Financial Transactions

Your PAN card is not just a piece of plastic; it’s a gateway to a myriad of financial activities. From filing your income tax returns to conducting high-value transactions, having a PAN card is imperative. Whether you’re a salaried individual, a business owner, or a freelancer, ensuring the validity and status of your PAN card is essential.

The Importance of NSDL PAN Status Check

Why NSDL?

NSDL, or the National Securities Depository Limited, is a pioneer in the financial services sector, providing efficient and reliable services related to PAN cards. Checking your PAN status through NSDL ensures accuracy and security, giving you peace of mind regarding your financial identity.

How to Check Your NSDL PAN Status

A Step-by-Step Guide

  1. Visit the NSDL Official Website: Start by visiting the official website of NSDL dedicated to PAN services. The user-friendly interface ensures a seamless experience.
  2. Navigate to the PAN Status Section: Look for the ‘PAN Status’ section on the website. Click on the link to proceed to the PAN status check page.
  3. Enter Your Details: Provide the necessary details such as your application number and date of birth. Ensure the accuracy of the information entered to avoid discrepancies.
  4. Verification Process: NSDL will initiate the verification process based on the details you’ve provided. This may take a few moments, so please be patient.
  5. Receive Status Update: Once the verification process is complete, you will receive a status update on your PAN application. You’ll be informed whether your PAN card is under processing, dispatched, or if there are any issues that need attention.

Common Issues and Solutions

Troubleshooting PAN Application Problems

While NSDL strives to provide efficient services, applicants might encounter issues during the process. Here are some common problems and their solutions:

  • Incorrect Details: Double-check the information you’ve entered. Even a minor mistake can lead to discrepancies.
  • Document Verification: Ensure all necessary documents are submitted along with your application to avoid delays.
  • Lost PAN Card: If you’ve lost your PAN card, apply for a duplicate card promptly to avoid any disruptions in your financial activities.

Conclusion: Empowering Your Financial Journey

In conclusion, staying informed about your PAN card’s status is fundamental to managing your financial affairs effectively. NSDL’s user-friendly interface and efficient services make the PAN status check process hassle-free. By following the steps mentioned in this guide, you can ensure the accuracy of your PAN details, empowering your financial journey.

How to Update Name Servers on GoDaddy

Updating name servers on GoDaddy is a straightforward process that ensures your domain points to the correct hosting provider. Follow these steps to make the necessary changes:

Step 1: Log in to Your GoDaddy Account

Start by logging in to your GoDaddy account using your username and password.

Step 2: Access Your Domains

Once logged in, locate and click on the “Domains” option in the main menu. This will take you to your domain management page.

Step 3: Select the Domain You Want to Update

From your list of domains, select the one for which you want to update the name servers. Click on the domain name to access its management options.

Step 4: Navigate to Name Servers

In the domain management panel, look for the section titled “Name Servers.” This is where you can make the necessary updates.

Step 5: Choose Custom Name Servers

By default, GoDaddy may use its own name servers. To use custom name servers (provided by your hosting provider), select the option that says “Custom.”

Step 6: Enter the New Name Server Information

Once you’ve selected the “Custom” option, you’ll be prompted to enter the new name server information provided by your hosting provider. Typically, you’ll have at least two name servers, in the format of ns1.example.com and ns2.example.com.

Step 7: Save Changes

After entering the new name server information, be sure to save the changes. GoDaddy will confirm that your settings have been updated.

Step 8: Allow Time for Propagation

It may take some time (up to 48 hours) for the name server changes to propagate across the internet. During this period, some users may still see the old version of your site.

Additional Tips:

  • Double-check the Information: Ensure that you’ve entered the correct name server information. Typos or incorrect details can lead to disruptions in service.
  • Consider Lowering TTL: Before making changes, consider lowering the TTL (Time to Live) value. This can help speed up the propagation process.
  • Contact Support if Needed: If you encounter any difficulties during this process, don’t hesitate to reach out to GoDaddy’s customer support for assistance.

That’s it! You’ve successfully updated the name servers for your domain on GoDaddy. Remember, patience is key as the changes may take some time to fully take effect. If you have any further questions or need assistance, feel free to reach out to GoDaddy support.

A Guide to Updating Name Servers

Name server updates are a crucial aspect of managing your online presence. Whether you’re moving to a new hosting provider or making changes to your existing setup, this guide will walk you through the process step by step.

Understanding Name Servers

Name servers are like the phone books of the internet. They translate human-readable domain names (like www.example.com) into IP addresses that computers use to identify each other on the network.

Steps to Update Name Servers

1. Log into Your Domain Registrar’s Account

Start by logging into the account with the domain registrar where your domain is registered. This is where you’ll find the necessary settings.

2. Locate Your Domain Management Panel

Once logged in, navigate to the domain management panel. This is where you’ll find all the settings related to your domain.

3. Locate the Name Server Settings

Look for an option like “Name Servers” or “DNS Settings” in your domain management panel. This is where you’ll make the updates.

4. Enter the New Name Server Information

Input the name servers provided by your new hosting provider. Typically, you’ll have two or more name servers in the format ns1.example.com, ns2.example.com, and so on.

5. Save Changes

After entering the new name server information, save the changes. It may take some time for the updates to propagate across the internet.

6. Verify the Update

You can use online tools to verify that the name server update has propagated. This ensures that your domain is now pointing to the correct hosting provider.

Additional Tips:

  • Backup your DNS settings: Before making any changes, it’s a good practice to take a screenshot or make a note of your current DNS settings. This can be helpful in case you need to revert the changes.
  • Check TTL (Time to Live): Consider lowering the TTL value in advance. This will help the DNS changes propagate faster.
  • Be Patient: It may take up to 48 hours for the name server changes to fully propagate across the internet. During this time, some users may still see the old version of your site.

Conclusion

Updating name servers is a fundamental aspect of managing your online presence. By following these steps and being patient during the propagation period, you can ensure a smooth transition to your new hosting provider.

If you encounter any issues during the process, don’t hesitate to reach out to your domain registrar or hosting provider for assistance.