How to Update Name Servers on GoDaddy

Updating name servers on GoDaddy is a straightforward process that ensures your domain points to the correct hosting provider. Follow these steps to make the necessary changes:

Step 1: Log in to Your GoDaddy Account

Start by logging in to your GoDaddy account using your username and password.

Step 2: Access Your Domains

Once logged in, locate and click on the “Domains” option in the main menu. This will take you to your domain management page.

Step 3: Select the Domain You Want to Update

From your list of domains, select the one for which you want to update the name servers. Click on the domain name to access its management options.

Step 4: Navigate to Name Servers

In the domain management panel, look for the section titled “Name Servers.” This is where you can make the necessary updates.

Step 5: Choose Custom Name Servers

By default, GoDaddy may use its own name servers. To use custom name servers (provided by your hosting provider), select the option that says “Custom.”

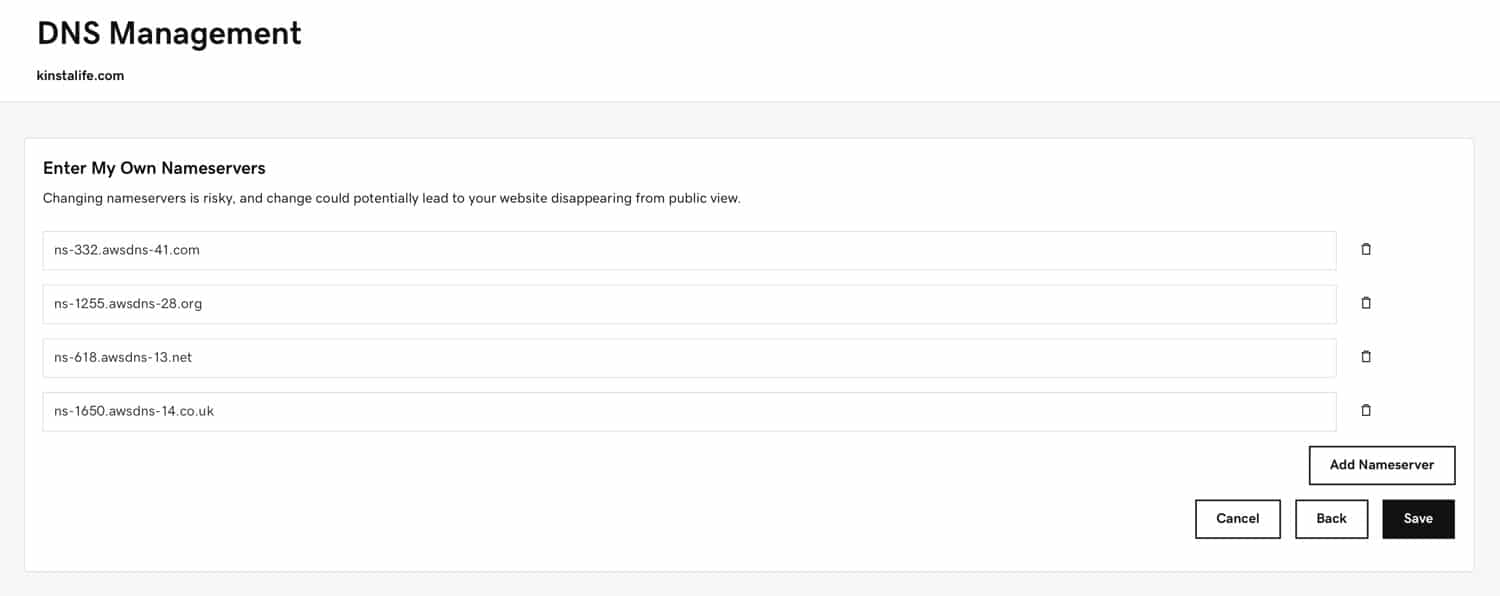
Step 6: Enter the New Name Server Information

Once you’ve selected the “Custom” option, you’ll be prompted to enter the new name server information provided by your hosting provider. Typically, you’ll have at least two name servers, in the format of ns1.example.com and ns2.example.com.

Step 7: Save Changes

After entering the new name server information, be sure to save the changes. GoDaddy will confirm that your settings have been updated.

Step 8: Allow Time for Propagation

It may take some time (up to 48 hours) for the name server changes to propagate across the internet. During this period, some users may still see the old version of your site.

Additional Tips:

  • Double-check the Information: Ensure that you’ve entered the correct name server information. Typos or incorrect details can lead to disruptions in service.
  • Consider Lowering TTL: Before making changes, consider lowering the TTL (Time to Live) value. This can help speed up the propagation process.
  • Contact Support if Needed: If you encounter any difficulties during this process, don’t hesitate to reach out to GoDaddy’s customer support for assistance.

That’s it! You’ve successfully updated the name servers for your domain on GoDaddy. Remember, patience is key as the changes may take some time to fully take effect. If you have any further questions or need assistance, feel free to reach out to GoDaddy support.

A Guide to Updating Name Servers

Name server updates are a crucial aspect of managing your online presence. Whether you’re moving to a new hosting provider or making changes to your existing setup, this guide will walk you through the process step by step.

Understanding Name Servers

Name servers are like the phone books of the internet. They translate human-readable domain names (like www.example.com) into IP addresses that computers use to identify each other on the network.

Steps to Update Name Servers

1. Log into Your Domain Registrar’s Account

Start by logging into the account with the domain registrar where your domain is registered. This is where you’ll find the necessary settings.

2. Locate Your Domain Management Panel

Once logged in, navigate to the domain management panel. This is where you’ll find all the settings related to your domain.

3. Locate the Name Server Settings

Look for an option like “Name Servers” or “DNS Settings” in your domain management panel. This is where you’ll make the updates.

4. Enter the New Name Server Information

Input the name servers provided by your new hosting provider. Typically, you’ll have two or more name servers in the format ns1.example.com, ns2.example.com, and so on.

5. Save Changes

After entering the new name server information, save the changes. It may take some time for the updates to propagate across the internet.

6. Verify the Update

You can use online tools to verify that the name server update has propagated. This ensures that your domain is now pointing to the correct hosting provider.

Additional Tips:

  • Backup your DNS settings: Before making any changes, it’s a good practice to take a screenshot or make a note of your current DNS settings. This can be helpful in case you need to revert the changes.
  • Check TTL (Time to Live): Consider lowering the TTL value in advance. This will help the DNS changes propagate faster.
  • Be Patient: It may take up to 48 hours for the name server changes to fully propagate across the internet. During this time, some users may still see the old version of your site.

Conclusion

Updating name servers is a fundamental aspect of managing your online presence. By following these steps and being patient during the propagation period, you can ensure a smooth transition to your new hosting provider.

If you encounter any issues during the process, don’t hesitate to reach out to your domain registrar or hosting provider for assistance.